
Automated environment deployments
Written by Kushagra Gour
September 22, 2017 — 4 Min Read | 3 Comments
Shipping a bug-free feature is always important in every release. To ensure this, we do quality analysis(QA) at various points of the feature cycle. To facilitate an efficient QA, we also maintain certain environments for our app, each serving a different purpose. We have the following environments to be specific:
- Production - The actual live app.
- Staging - A replica of the production where final sign-off QA is done just before going live.
- Test - A quick deployable environment which can be used by developers to share the WIP feature branch with anyone in the company or among other developers.
With multiple features in development simultaneously and multiple environments to deploy, automated deployment becomes very important to ensure frictionless and fast feature lifecycle. In this post, I'll try to explain how to manage all these environment deployments through automation, especially for our product VWO.
Tests
As mentioned above, tests are very lightweight environments which developers generally create to share their WIP feature branch with other developers, QA or someone from marketing/product to gather feedback. Our app consists of various components: frontend, main-backend and various other micro-services. So each test environment is a combination of different branches from each of the constituent components. For example our app have following components: frontend, backend and Service-1. So our tests can look like:
Test #1 - master (frontend) + feature-notifications (backend) + master (service-1)
Test #2 - feature-auth (frontend) + feature-auth (backend) + master (service-1)
And as these tests should have a unique sharable URL, they can be given names like: feat1.vwo.com or heatmap-optimizations.vwo.com
Deployment
To deploy such a test we have a job on Jenkins. As you may have guessed already, the inputs to this job are:
- Name of the test instance
- Frontend branch
- Backend branch
- Service-1 branch
Once this job runs, it pulls on all the above 3 branches on a remote server, does some configuration changes and creates a virtual host to work on testname.vwo.com.
More automation
Now, even this job would require the developer to open Jenkins webapp, go to job page, put in inputs and then run it. But we avoid that too - enter Ramukaka! Ramukaka is our Skype bot (that we have open-sourced as well) which we use for various grunt tasks, such as running a Jenkins job!
With Ramukaka in the picture, our test deployment looks like so:
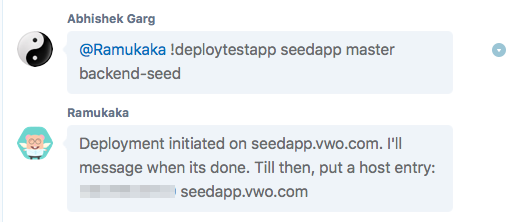
Note: We have 3 components and have only 2 branches are specified. That is because the developer can skip a component if the branch to be deployed is default i.e. master. Also, the same command just pulls the latest changes in case the test instance already exists.
Neat, right?
Staging
Staging has primarily 2 differences from test:
- There is a single staging unlike multiple tests.
- There are some more build steps involved compared to a test.
So it's similar to a test deployment, except that before deploying it required the developer to build his/her branch like so:
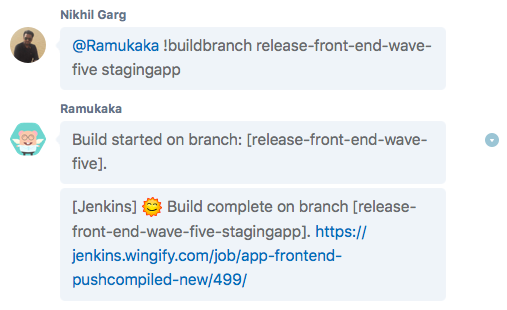
Note: While building a branch we also inform the job about the environment to build for (eg. stagingapp above) because right now the code needs to be a bit tweaked according to the domain its deployed on.
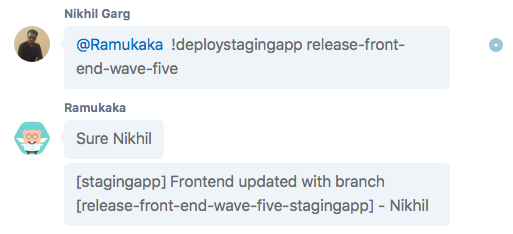
And once Ramukaka confirms a successful build, the developer can deploy the staging with that branch:
Some more commands
As I had mentioned, we have just one staging (single gateway to production). Therefore, each deployment overwrites the previous deployment. And so it becomes important that developers do not overwrite each other's deployment by mistake. To prevent this, we have an additional command in Ramukaka called currentBranch. Through this command anyone can check which branch is deployed for a particular component on the staging. Eg. if I need to check the frontend branch on staging, I would do so:
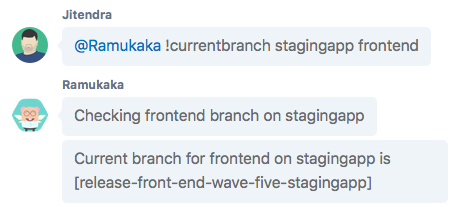
Now the developer can take appropriate actions based on the deployed branch.
Production
The production is no different from the staging. Once the final round of testing is done by the QA team on staging, there are 3 things that need to be done to deploy the app on production:
- Build the branch
- Create a tag for release on master branch
- Deploy the tag on the server
All the 3 tasks are handled through a single command on Ramukaka:
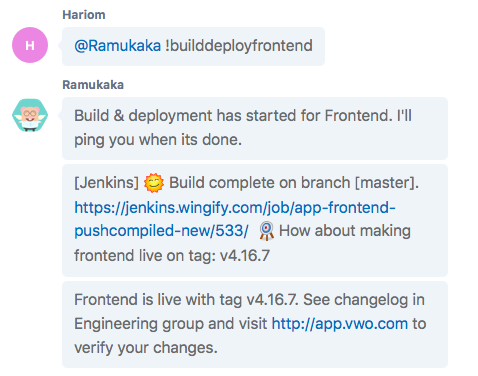
And the frontend gets deployed on production, just like that!
Note: Right now only the frontend deployment is automated for production. But we plan to do it for all the components of the app.
Going Ahead
All this deployment automation saves us a huge amount of time. And we know we can save more. Using similar automation for every component of the app is something we plan to do next. Also better logging and monitoring of these environments is on the list.
How do you manage multiple environments? We would love to hear about your deployment techniques if you want to share in the comments.
Until next time!